Monday 21 December 2015

Deprecated VMFS Volumes found on host. Please consider upgrading volume(s) to the latest version“.


The resolution was to restart the management agents on the host. I put the host in maintenance mode then restarted the management agents:
services.sh restart
For more information Please visit ..
https://www.virtuallyboring.com/deprecated-vmfs-volumes-found-on-the-host/

Wednesday 16 December 2015

Cloning a virtual machine fails with the error: A general system error occurred: PBM error occurred during PreCloneCheckCallback 


the target host does not support the virtual machine's current hardware requirements


Sunday 6 December 2015

New Configuration Maximums of vSphere 6.0: 


  • vSphere 6.0 Clusters now supports 64 Nodes and 8,000 VM’s (Which was 32 Nodes and 4,000 VM’s in vSphere 5.5)
  • vCenter Server Appliance (vCSA 6.0) supports upto 1000 Hosts and 10,000 Virtual Machines with embedded vPostgres database
  • ESXi 6.0 host now supports support up to 480 physical CPUs  and 12 TB RAM (which was 320 CPUs and 4 TB in vSphere 5.5)
  • ESXi 6.0 host Supports 1000 VMs and 32 Serial Ports. (which was 512 VM per host in vSphere 5.5)
  • vSphere 6.0 VM’s will support  up to 128 vCPUs and 4TB vRAM (which was 64 vCPU’s and 1 TB of memory in vSphere 5.5)
  • vSphere 6.0 continuous to support 64 Tb Datastores as same as in vSphere 5.5
  • Increased support for virtual graphics including Nvidia vGPU
  • Support for New Operating systems like FreeBSD 10.0 and Asianux 4 SP3 
  • Fault Tolerance (FT) in vSphere 6.0 now supports upto 4 vCPUs (which was only 1 vCPU in vSphere 5.5)
I would like to provide a Quick Comparison table between the Configuration maximums of  vSphere 5.5 and vSphere 6.0:
For More Information please visit :-  http://www.vmwarearena.com/2015/02/vsphere-6-0-new-configuration-maximums.html
vSphere 6.0 Configuration Maximums

VMware vSphere 6 Installation :- 


VMware vSphere 6.0 provides various options for installation and setup, similar for ESXi, new for the vCenter part. Note that the screen shoots are from the beta version, so maybe could change in the final RC.

ESXi Server

ESXi interactive installation remain the same and similar are the requirements and also the size of the ISO and the deployment options.
Same remain the layout of the partition in the ESXi disk (for more information see this post about the partitions layout of ESXi) and you can still install in only 1 GB of space (little less due to partition layout). Although a 1GB USB or SD device suffices for a minimal installation, you should use a 4GB or larger device: the extra space will be used for an expanded coredump partition on the USB/SD device (see KB 2004784).
Of course the will be a new Hardware Compatiblity List for ESXi 6.0, but conceptually you still need a 64-bit processor (after September 2006), with at least two core, support for hardware virtualization (Intel VT-x or AMD RVI) must be enabled on x64 CPUs and also the NX/XD bit must be enabled for the CPU in the BIOS. The minimum amount of memory is 4GB of physical RAM.
If you plan to install in a virtual lab (you can use also VMware Workstation 9 or 10, not necessary the 11 version, or also ESXi 5.5) you cannot install with less than 3.9GB.
The GA with 3.8 GB will just report that the memory is not enought, but with less memory could also appen that you will see generic error load in some modules during the bootstrap of the setup procedure… Or just stop in the “user loaded successfully” phase (with 2.5 GB of RAM).
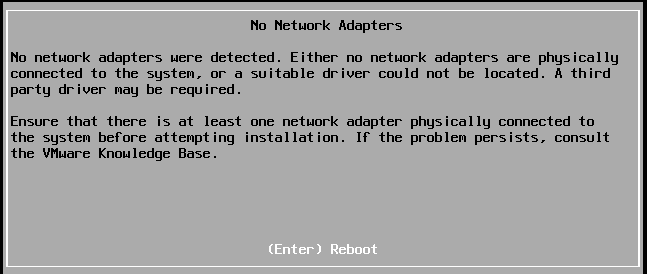
In the RC was also possible install with just 3GB (and also little less), but if you try to install it with only 2GB you will have strange behaview where some drivers are not load ad you will have strange message like this:
ESXi6-MemRequirements

vCenter Server

You can install vCenter Server on a Windows host machine, or deploy the vCenter Server Appliance. The vCenter Server Appliance is a preconfigured Linux-based virtual machine optimized for running vCenter Server and the vCenter Server components. You can deploy the vCenter Server Appliance on hosts running ESXi 5.5 or later. The virtual appliance version is now fully comparable with the Windows installable version, and (from my point of view) it must become the first choice. I will cover more about it in a dedicated post.
Supported databases for the Windows installation are SQL 2008 R2, 2012 and 2014, Oracle  11g and 12c as well as the option to use an embedded vPostgres database.
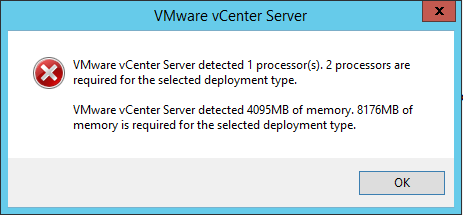
The resource requirements remain still the same of previous version, but now the minum amount are mandatory for the installation:
vCenter-Requirements
If you plan to deploy it in a lab with limited resource you must sadisfy the minimum requirement during the installation and after that you can try to reduce the memory (with 6GB it works, slowly, but it works).
Real resource requirements depends on the size of your environment and the minimum are suitable for a tiny environment (up to 20 hosts or 400 VMs). The installation guide provide the correct numbers for CPU and memory for other size of environments.
Note that althout the installation media is smaller from the previous version (at least for the Windows installable version), the required space for the Windows version is now 17GB minimum (due to the new components), so plan it carefully. If you deploy the Platform Services Controller on a dedicated machine, only 4GB of free space are required.
There are different deplyment scenarios for vCenter Server, for more information see this post.
In this post will be explained the simple installation (one single system) of the Windows version that could be scripted, or interactive and wizard driven (like in the previous version).
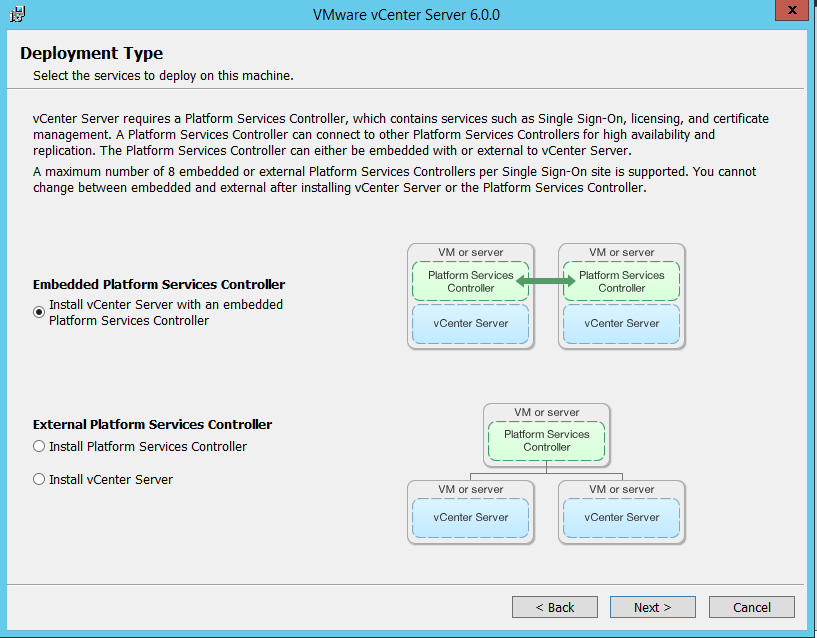
Use of the embedded model is meant for standalone sites where this vCenter Server will be the only SSO integrated solution and replication to another PSC is not needed. The recommendation is to deploy external PSC’s in any environment where there is more then one SSO enabled solution (vCenter Server, vRealize Automation, etc) or where replication to another PSC, such as another site, is needed.
Note also that starting with vSphere 6 all vCenter Server services such as the vSphere Web Client, Inventory Service, Auto-Deploy, Syslog Collector, Network dump collector, etc. are installed on the same server as the  vCenter Server. There is no longer a way to run these components on a different server from vCenter Server. The exception to this is vSphere Update Manager (VUM), it is still a separate installation and can be installed on a different server, in the case of the vCenter Server appliance VUM must be installed on a windows server and registered with the vCenter Server appliance as VUM is a windows only service.
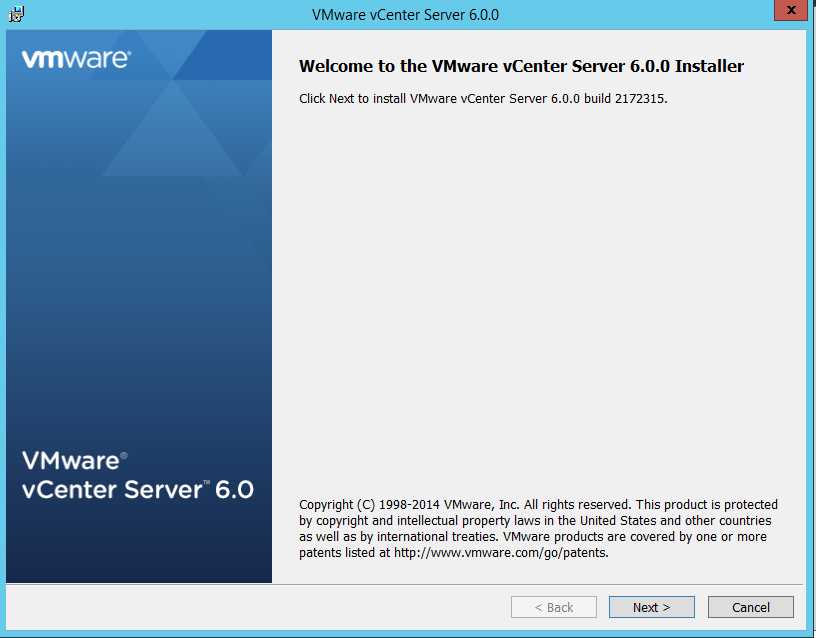
When you start the installation from the vCenter DVD, the first screen will be a welcome window:
vCenter-Windows-Install1
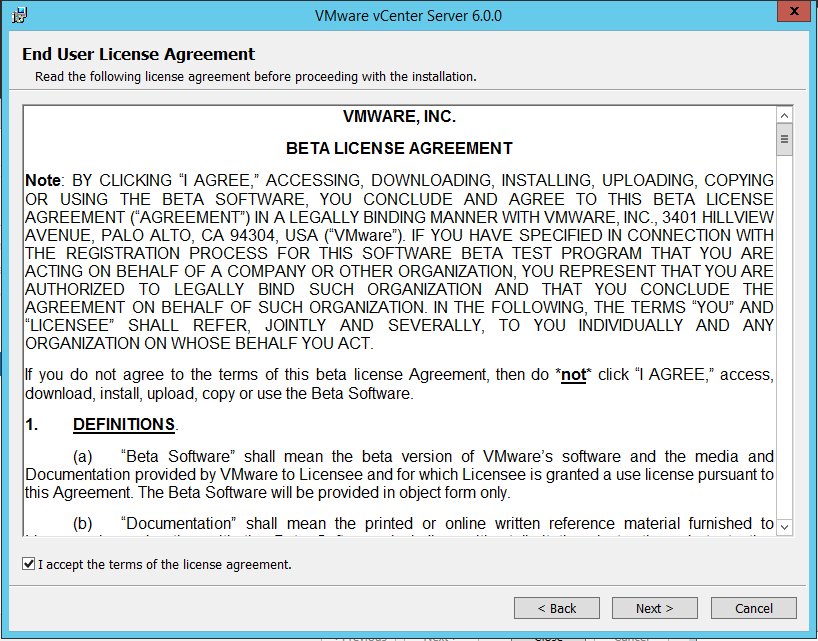
Then there is the end user license agreement (note that in this screenshoot was still with the beta version):
vCenter-Windows-Install2
At this point you have to choose the deployment type: as written in the previous post about vCenter design and deployment, there are now two main components, with different deployment scenarios. Let’s consider the embedded Platform Server Controller scenario, that is mainly like a Simple Install in vCenter 5.x:
vCenter-Windows-Install3
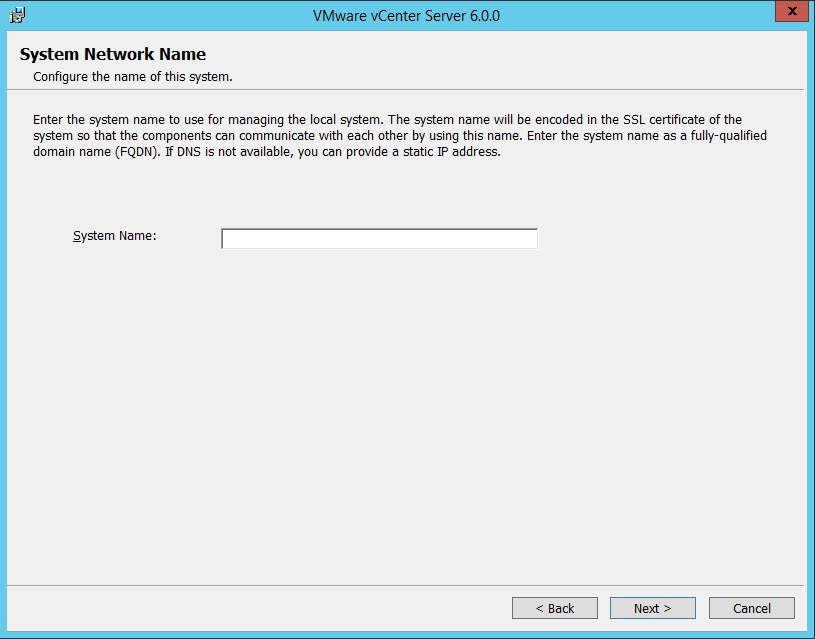
You must configure the System Network Name that must be a FQDN or an IP address: the name (or the IP, if don’t have DNS resolution) cannot be changed after the installation of vCenter Server:
vCenter-Windows-Install4
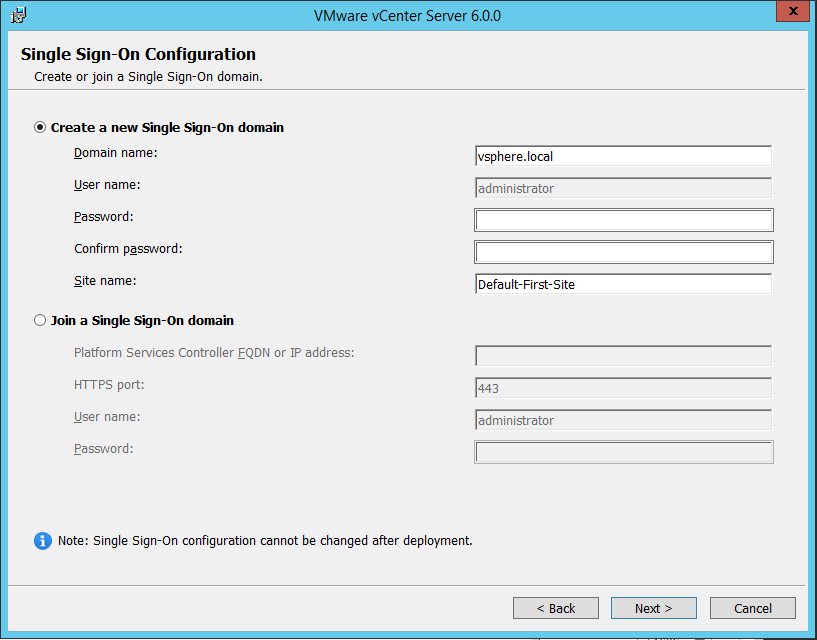
At this point you have the Single Sign-On (SSO) configuration with basically the same option of vCenter 5.5. You can join it to an existing SSO (to an existing Platform Services Controller) or just create a new one (of course mandatory for the first system):
vCenter-Windows-Install5
Note that you cannot change the SSO configuration after the deployment and that the available option when you join a SSO to an existing one are the same of SSO 5.5 and define if you are implementing a multi-site or single-site scenario.
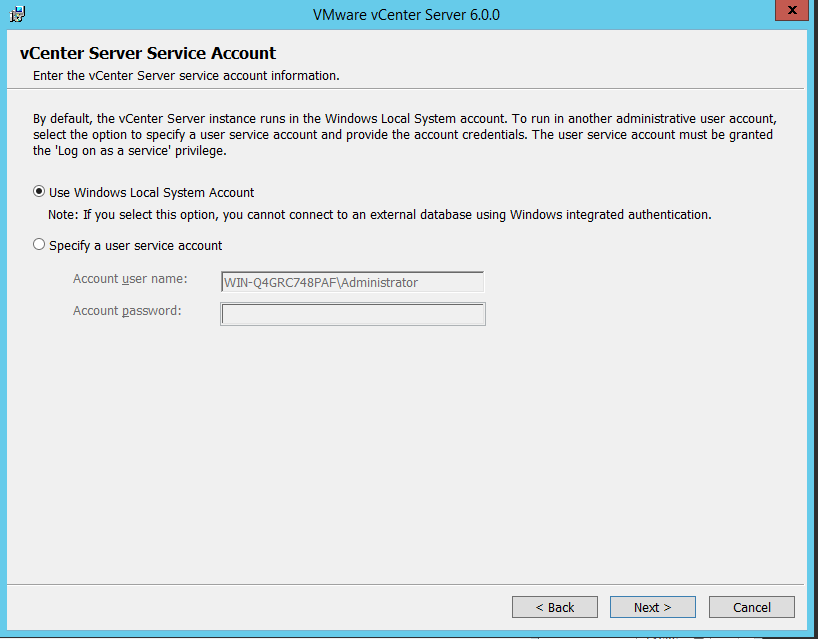
At this point you have to choose a vCenter Server service account (by default it runs with Windows Local System account):
vCenter-Windows-Install6
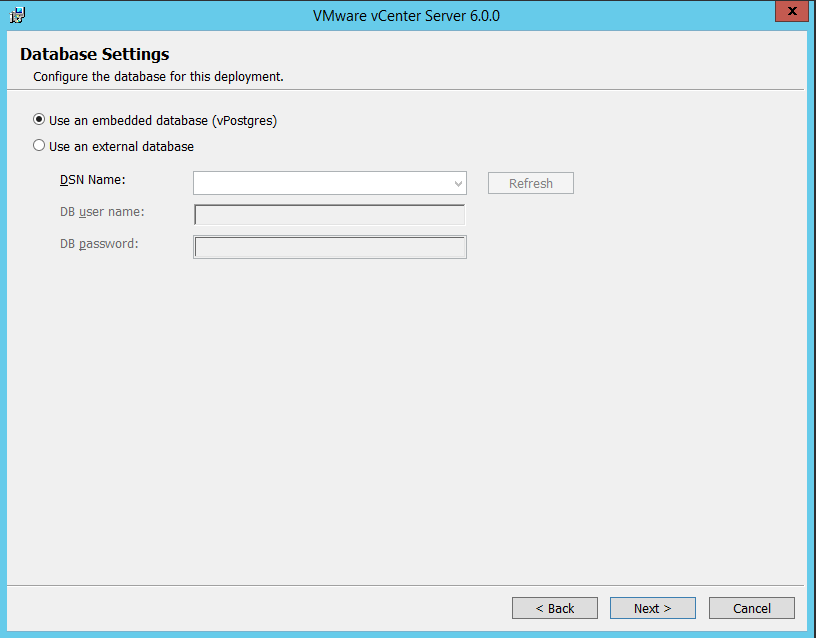
Then you have to specify a database for vCenter: you can use external DBMS or and embedded one that will be Postres also for the Windows version (big changes compared to all the previous version of vCenter Server).
vCenter-Windows-Install7
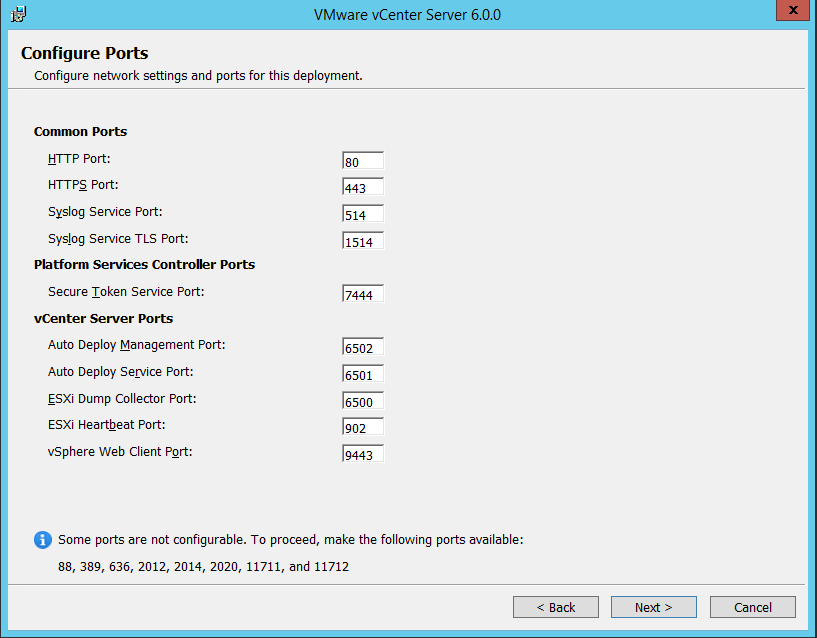
You can configure the network ports used by the different services, but usually could be better keep them as the default (and use a dedicated machine for vCenter can help to avoid port overlap with other services):
vCenter-Windows-Install8
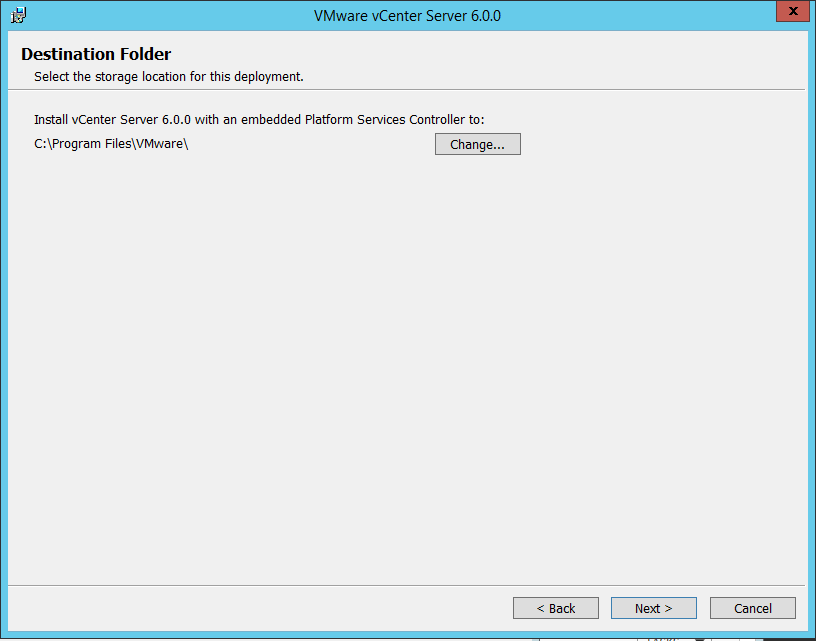
You can also change the destination folder, but remember that past of the installation will still goes in the system disk (usually C:).
vCenter-Windows-Install9
Finally you will have a recap with all the choiches and you can now start the installation. Was nice have (in this window) a “show button” to see the right script configuration in order to repeat the installation exactly in the same way using an unattended installation.
vCenter-Windows-Install-Recap
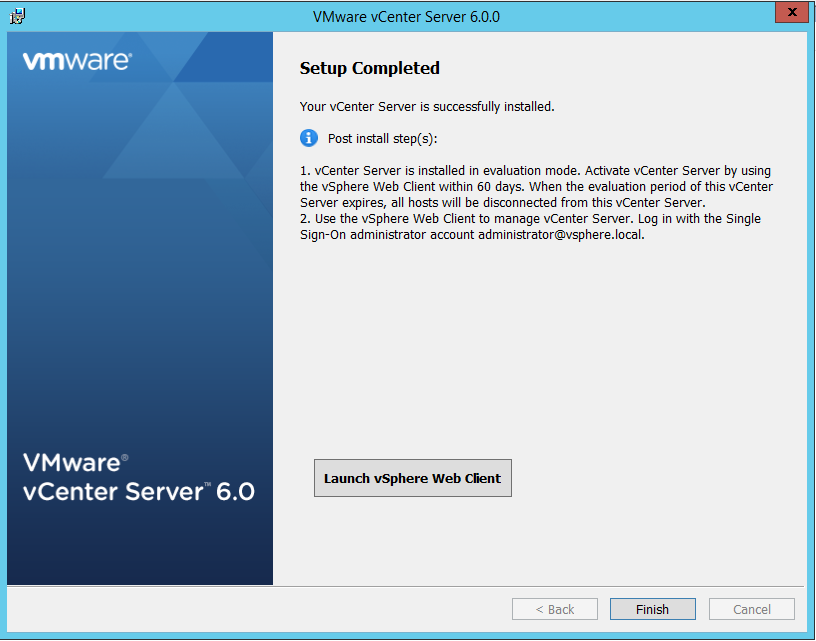
When the installation has finished you can launch the vSphere Web Client and start configuring your vCenter.
vCenter-Windows-Install-End
Note that now is really a single installation, not multiple installation like the Simple Installation of vCenter 5.x where each steps will ask you something.

VUM

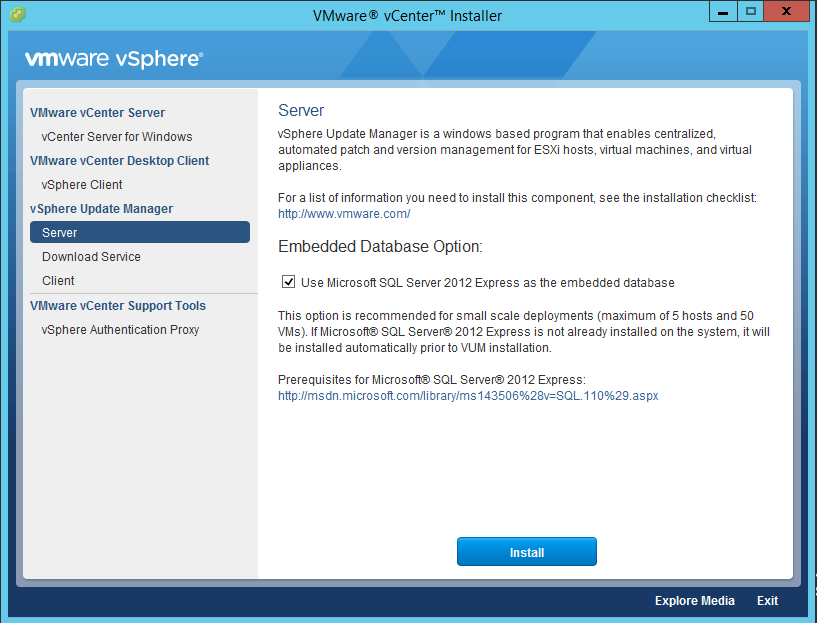
The VMware vSpere Update Manager hasn’t changed, in the server part, from the previous versions (it can manage the patches both for ESXi 6.0 and 5.x). It’s still a separated Windows components that can be installed in the same machine of vCenter Server (if it is Windows) or on a separated (not necessary dedicated) Windows machine.
If you choose to use the embedded database, the installer will install a Microsoft SQL Server 2012 Express DMBS (also if you are installing VUM on the same machine of vCenter).
VUM-Install1
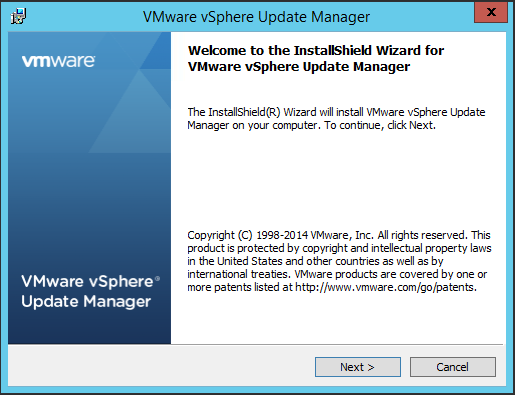
The installation phases remain the same, starting from a welcome screen:
VUM-Install2
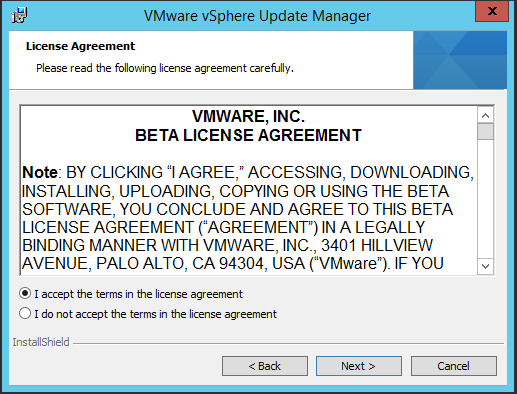
The end user license (in this screenshoot was still the beta version):
VUM-Install3
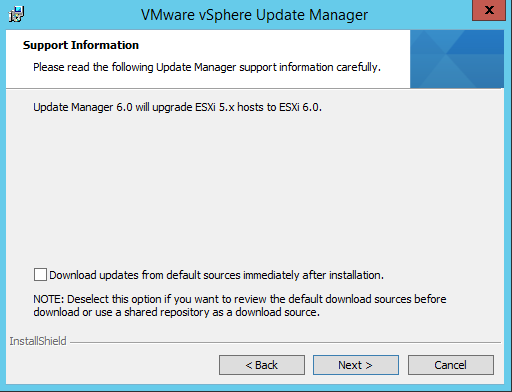
Then you can choose to download updates from default source immediately after the installation:
VUM-Install4
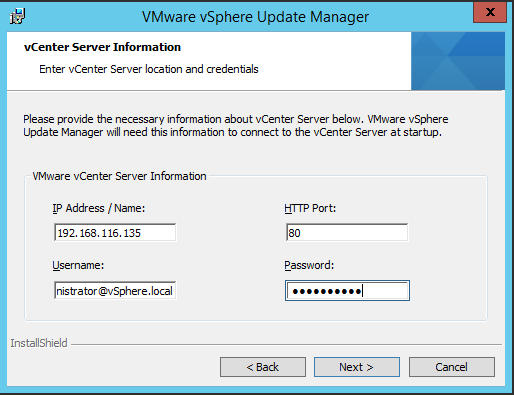
Then you need to provide the right credentials to VUM for connecting with the vCenter Server:
VUM-Install5
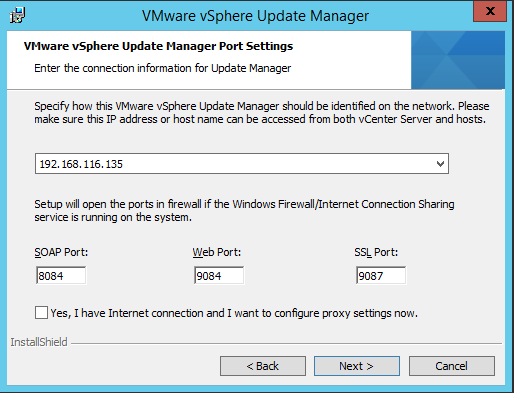
Now you can specify the ports, if you need a proxy and how VUM will be exposed: using the FQDN or using an IP (just because was an installation in a lab):
VUM-Install6
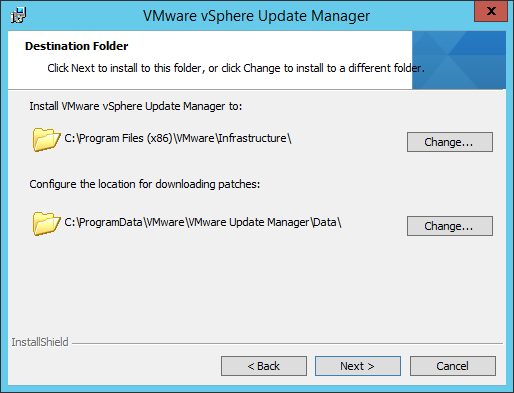
Then you can choose the installation directories. Remember that the location for downloading patches will grow, so it could be useful in a real environment choose a different disk for it.
VUM-Install7

In the GA the VUM Client has become simple the common plug-in for the vSphere Client. For more information see also the vSphere 6 client’s post.

For more Information please visit :- 
 http://vinfrastructure.it/2015/02/vmware-vsphere-6-installation/

Saturday 5 December 2015

It is possible to open the DCUI (Direct Console User Interface) via SSH :- 


Open a putty to your ESXi Host (it is necessary to enable SSH – you can find a „how-to“ below) and run the command „dcui“:
… now you can use the good old shell:
If you want the known yellow/grey skin just run the following command before starting the dcui:
export TERM=linux
How to enable SSH on your ESXi Host:
1. open Virtual Center – select the ESXi Host and „Configuration“ Tab
2. select „Security Profile“
3. now doubleclick SSH in the „Services Properties“ window
4. start the SSH service

Thursday 3 December 2015

VMware vCenter Server VCSA 6.0 Sysprep Files Enable The “Pi Shell” :- 


VMware vCenter Server (VCSA 6.0) Sysprep Files – enable the “Pi Shell” – Here is how it works:

0. Make sure that SSH in enabled on the VCSA. Home > Administration > System configuration(under Deployment) > Select the node > Actions > Edit Settings
VCSA 6.0 enable SSH
1. log in to the VCSA by using for example Putty SSH client and use your root account and password you used during the installation.
2. Enter this to enable the “pi shell”
shell.set –enabled true
shell
chsh -s “/bin/bash” root
Screenshot …
How to enable shell in VCSA 6.0
3. Then you can use for example WinSCP and upload the sysprep files to the individual folders which do not needs to be created as they’re there.
The filepath is /etc/vmware-vpx/sysprep
VCSA 6.0 Sysprep Files how to upload
If you don’t upload those files you’ll get an error when wanting to deploy new VM from your template. Here is an example for Windows XP VM…
Windows customization resources were not found on the server
Update: Make sure that you disable the shell when you finish.
shell.set –enabled false
Note that there is a well known VMware KB which discusses the location of sysprep files:
The contents of the Sysprep deploy.cab file must be extracted to the Sysprep Directory on the vCenter Server host. If the file downloaded from the Microsoft Web Site is a .cab file, the Installing the Microsoft Sysprep Tools in the vSphere Virtual Machine Administration guide details how to install the Sysprep Tools.
If the file downloaded from the Microsoft Web Site is a .exe file, these additional steps must be executed to extract the files from the .exe:
  • Open a Windows command prompt. For more information, see Opening a command or shell prompt (1003892).
  • Change to the directory where the .exe file is saved.
  • Enter the name of the .exe file with the /x switch to extract the files. For example:
WindowsServer2003-KB926028-v2-x86-ENU.exe /x

For more Information please visit :- http://www.vladan.fr/vmware-vcenter-server-vcsa-6-0-sysprep-files-enable-the-pi-shell/


Monday 23 November 2015

Orphaned VM State  :-  


What is an Orphaned VM, let’s find the reason of orphan virtual machines.
In VirtualCenter under very rare circumstances, you may find that you have a virtual machine that has an orphan designation. An orphan virtual machine is one that VirtualCenter discovered previously, but currently is not able to identify the associated host. 


Launch Virtual Center or Virtual Client
Right click on the orphaned virtual machine
Select ‘Remove from Inventory’
Now go the summary page of the ESX host and select correct datastore 
Browse the datastore form the .vmx file of the VM
Now locate the VMX file.
Right click on the .vmx file of the VM and choose ‘Add to Inventory’
Go through the wizard and your Virtual Machine should appear online again.

Thursday 19 November 2015

How to Reset vi-admin Password on vMA 5


Well, I’ve been here before. Came to use the vMA I have set up in my lab environment earlier, and got the following when trying to log in…
The procedure for resetting the password on vMA 5 is different to earlier versions, so will run through it here. First of all we need to restart the appliance, and change an option on the GRUB bootloader:
Now we need to select the first option “SUSE linux Enterprise Server 11 SP1 for VMware” and press ‘e’ to edit.
Go to the second line, that starts with “kernel /vmlinuz..” and again press ‘e’ to edit. Move to the end of the line and add the following: init=/bin/bash and hit Enter.
Now press ‘b’ to boot the vMA. The vMA will boot and you will be presented with  a command prompt.
Reset the vi-admin password, by entering the following command:
# passwd vi-admin
Once done, reboot the vMA. You should now be able to log in!

Wednesday 18 November 2015

VMware vSphere 6.0 vs vSphere 5.x – Difference

What’s New in VMware vSphere 6.0 ?
  1. VMware vSphere Virtual Volumes. (vvols)
  2. vSphere Content Library .
  3. Cross-vCenter Clone and Migration
Let’s see the comparison between VMware vSphere 6.0 and VMware vSphere 5.5 & 5.1 versions.
ESXi – Hypervisor Level – Comparison:
Hyper-visor Level  comparison - VMware

Virtual Machine Level Difference:
Virtual Machine Level Comparision

VMware vCenter Level Differences:
VMware vCenter Level Comparision


Difference between ESX and ESXi

 ESX 4.1 is the last version availability of ESX server. 

Capability
ESX     
ESXi
Service Console
Present
Removed
Troubleshooting performed via
Service Console            
ESXi Shell
Active Director Authentication
Enabled
Enabled
Secure Syslog
Not Supported
Supported
Management Network
Service Console Interface
VMKernel Interface
Jumbo Frames
Supported
Supported
Hardware Montioring
3 rd Party agents installed in Service console
Via CIM Providers
Boot from SAN
Supported in ESX
Supported in ESXi
Software patches and updates
Needed as smilar to linux operation system
Few pacthes because of small footprint and more secure
vSphere web Access
Only experimental
Full managenet capability via vSPhere web client
Locked Down Mode
Not present
Present . Lockdown mode prevents remote users to login to the host
Scripted Installtion
Supported
Supported
vMA Support
Yes
Yes
Major Administration command-line Command
esxcfg-
esxcli
Rapid deployment via Auto Deploy
Not supported
Supported
Custom Image creation
Not supported
Supported
VMkernel Network Used for
vMotion,Fault Tolarance,Stoarge Connectivity
Management Network , vMotion, Fault Tolarance, Stoarge Connectivity, ISCSI port binding
what's new in vsphere 6 :- 

vSphere 6 ESXi and VM enhancements:

  • Cluster now supports up to 64 nodes and 8.000 VMs
  • VMs now support up to 128 vCPUs and 4 TB vRAM
  • Hosts now support up to:
    480 pCPUs
    12 TB RAM
    datastores with 64 TB
    1000 VMs

Storage:

  • Virtual Volumes (VVol)
  • improved Storage IO Control
vSphere Fault Tolerance:
  • FT support for up to 4 vCPUs and 64 GB RAM
  • new, more scalable technology: fast check-pointing to keep primary and secondary in sync
  • continuous availability – zero downtime, zero data loss for infrastructure failures
  • FT now supports Snapshots (Backup)
  • Storage Fault Tolerance:
    primary and secondary VM has its own .vmx & .vmdk files
    primary and secondary VM can be placed on different datastores!
vMotion Enhancements:
  • vMotion across vCenter Servers
  • vMotion across vSwitches
  • Long-distance vMotion – now support of local, metro and cross-continental distances (up to 100+ms RTTs)

vCenter Server Appliance:

  • the configuration maximums of the vCenter Server Appliance will be extended:
    The embedded DB now supports up to 1.000 Hosts and 10.000 powered on VMs (vSphere 5.5: 100 hosts/3000 VMs)

vSphere Web Client:

  • long awaited performance improvements are implemented
  • but nevertheless a Virtual Infrastructure Client 6.0 (C#) will be still available
Improved vSphere Replication:
  • Recover Point Objectives (RPOs) will remain at 15 minutes (was at 5 min in early builds – maybe it will be higher in later releases)
  • support for up to 2000 VM replications per vCenter

VMware Virtual SAN (VSAN 6.0)

  • new On-Disk Format
  • Performance Snapshots – vsanSparse
  • usability improvements
  • supports Failure Domains (note: failure domains are NOT metro/streched clusters)
  • new disk serviceability feature

In vSphere 5.5 the maximum supported host memory was 4TB, in vSphere 6 that jumps up to 12TB. In vSphere 5.5 the maximum supported # of logical (physical) CPUs per host was 320 CPUs, in vSphere 6 that increases to 480 CPUs. Finally the maximum number of VMs per host increases from 512 in vSphere 5.5 to 1000 VMs per host in vSphere 6. While this is greatly increased I’m not sure there are many people brave enough to put that many VMs on a single host, imagine the fun of HA having to handle that many when a host fails.
v6-new2


v6-new3

Monday 16 November 2015


Allocate a static IP address to the VMware vCenter Server Appliance (VCSA) :-


When deploying the VMware vCenter Server Appliance (VCSA) it will default look for a DHCP address. When there is no DHCP server available the following error is displayed:
NO NETWORKING DETECTED.
image
it is possible to manually configure a static IP address by using the command line. Here are the steps:
  • Open a console session of the VCSA 
  • Login as: root
  • Default password is: vmware
  • Execute the following command:
/opt/vmware/share/vami/vami_config_net
  • After executing the command, a menu is displayed. Within the menu It is possible to change the IP address, hostname, DNS, Default gateway and proxy server.
image
  • After allocate a static IP Address to the VCSA the post configuration can be done by using the following URL: 
https://static-ip-address:5480