Friday 15 January 2016

How to Run Hyper-V in vSphere 5.5


How to Run Hyper-V in vSphere 5.5 :- 


VMware vSphere has the special ability to nest hypervisors, e.g. Host a Hypervisor as a virtual machine. But it is not enabled by default; if you try to add the Hyper-V role to a Microsoft Windows Server, you will receive the following error message:-
 
Hyper-V cannot be installed: A hypervisor is already running.
2014-12-10-12-39-23-Greenshot.jpg
 This is correct, because this virtual server FS01, is being hosted by a VMware vSphere (ESXi) 5.5 Server.


Shut down the virtual machine, because we need to edit the virtual machine configuration settings (the VMX file).

2014-12-10-13-17-13-Greenshot.jpg
At the VMware vSphere (ESXi) inventory, Remove the Virtual Machine from the Inventory. To do this, Right Click the virtual machine, and select Remove from Inventory.

2014-12-10-13-22-21.jpgThe next few steps can be done in many different ways. Essentially, you need to edit the virtual machine VMX file on the VMware vSphere ESXi host server. I've listed some methods here: 
 
  1. Download the VMX file using the datastore browser, edit the VMX file in Windows notepad, and then upload the VMX file back to the host, overwriting the original.
  2. At the ESXi console, or remoely via SSH, edit the VMX file using vi.
  3. Use WinSCP, connect to the VMware vSphere (ESXi) server and edit the file directly.

I'm going to demonstrate Option 3 in this tutorial. It's quicker.

Download WinSCP from here - http://winscp.net/eng/index.php and start WinSCP. Enter the 
 
  • hostname, IP Address or fully qualified domain name (fqdn)
  • username
  • password

and Click Login to login and connect to your VMware vSphere (ESXi) host.

WinSCP.jpg
Select the virtual machine machine datastore and folder. In this tutorial, the virtual machine is stored on datastore /vmfs/volumes/nfs_datastore8_dcs_san2a

WinSCP1.jpg
Right Click the vmx file in the right hand pane. In this tutorial the file is called fs01.vmx and click Edit:

2014-12-10-14-29-02-FS01---WinSCP.jpg
Notepad will launch, add the following lines to the VMX file
 
vhv.enable = "TRUE"
hypervisor.cpuid.v0 = "FALSE"
 Open in new window

2014-12-10-14-41-08--vmfs-volumes-2868ea
Save the file, and exit WinSCP. Browse to the location of the virtual machine folder on the datastore, and register the VMX file with the Inventory.

Right Click the VMX File > Add to Inventory

2014-12-10-14-45-00-vcenter.net.dcs.hull
TOP TIP: If the files icon appears like a "blank notepad" -- examples of this are the files beneath the FS01.vmx file -- the VMX file you have updated is not correct or corrupted. This could be something as simple as missing quotation marks!

Power-up and start the virtual machine.

2014-12-10-14-56-01-FS01.jpg
Login to the server, and add the Hyper-V Role. Select Add roles and features


2014-12-10-15-33-32-FS01.jpg
Click through the wizard, and select the Hyper-V role.


2014-12-10-15-39-03.jpg
Click Add Features.


2014-12-10-15-43-48-Greenshot.jpg
Follow by Next to continue (it's at this point usually the error message is displayed, 
Hyper-V cannot be installed: A hypervisor is already running.
as shown at the start of this article).


2014-12-10-15-45-06-Greenshot.jpg
Continue with the wizard, and Click Install to complete the installation of Hyper-V. Tick the box to Restart the destination server automatically if required.

2014-12-10-15-49-05-Greenshot.jpg
The installaton will start.


2014-12-10-15-50-46-Greenshot.jpg
A Progress bar is displayed as installation progresses


2014-12-10-15-51-22-Greenshot.jpg
A Progress bar is displayed as installation progresses.


2014-12-10-15-51-40-Greenshot.jpg
The server will restart to add the Hyper-V role and features.


2014-12-10-15-52-02-Greenshot.jpg
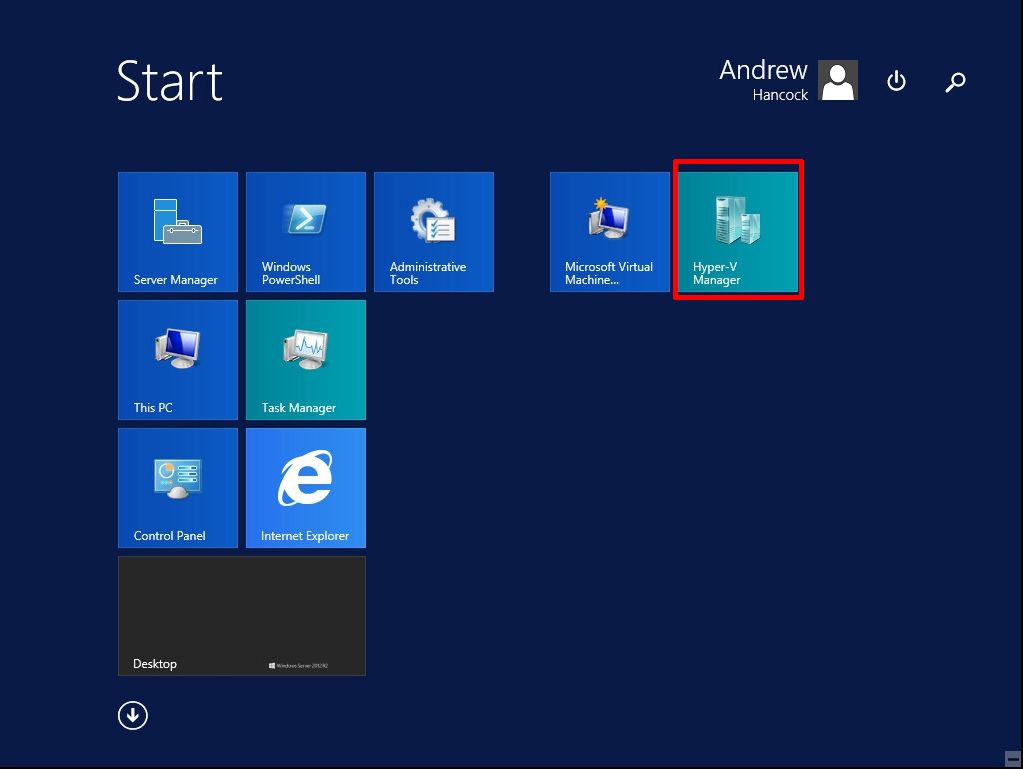
Click the Hyper-V Manager icon on the start menu.


2014-12-09-16-26-12-Greenshot.jpg
The Hyper-V Manager will show the Inventory. You are now ready to create virtual machines.


2014-12-10-15-55-41-Greenshot.jpg
Congratulations you have successfully ENABLED and RUN Microsoft Hyper-V in a VMware vSphere Virtual Machine.

How to Run Hyper-V in vSphere 5.1 


Hyper-V cannot be installed 

If you are running Hyper-V on a physical server (with no virtualization hypervisor in between) then either your CPU really is not compatible or you need to enable Intel-VT or AMD-V in your server’s BIOS.
However, if you are trying to run Hyper-V in a virtual machine (and your physical server has Intel-VT / AMD-V enabled) and you are getting this message in a VMware product then you need to make the tweaks below.
Hyper-V cannot be installed

Step 1

If you are using vSphere 5 or greater then you need to modify the vmware config file on the ESXi host that will run the Hyper-V virtual machine. To edit this file, ssh to the server and vi /etc/config/vmware. Add the line vhv.allow = “TRUE” to the file and save it with “wq”.
Hyper-V cannot be installed-2

Step 2

Next, power off the Hyper-V VM and remove it from inventory. Browse the datastore that the VM is stored on and download the VMX configuration file to your local computer. Use Wordpad, or a similar text editor, to edit the VMX configuration file that you downloaded.
Change the guestos line to read:
guestOS = “winhyperv”
Save the file and upload it back to the datastore using the datastore browser.
Right-click on the virtual machine’s VMX configuration and use “Add to Inventory” to add the VM back to the ESXi host that it was on (where you added the vhv.allow line).
Hyper-V cannot be installed-6

Step 3

Finally, upgrade the virtual machine hardware to hardware version 9 by right-clicking on the VM and clicking Upgrade Virtual Hardware.
Hyper-V cannot be installed-3
Now, power on the virtual machine and you shouldn’t have any trouble adding the Hyper-V role, as you see below.
Hyper-V cannot be installed-7
With this configuration, you’ll also be able to run 64-bit nested virtual machines inside this virtualized Hyper-V host. In the example below, you can see Windows Server 2012 running inside Windows 2008 R2 as a Hyper-V VM, which is running inside vSphere 5.1 as a virtual machine (that’s a VM in a VM, all running inside vSphere).
Hyper-V cannot be installed-8


Cloning a VM without vCenter :- 


In this example .
vSphere client connection
First connect to the VSphere using the vSphere client and power off the source VM.
vSphere client User Interface
Select the Configuration tab and Storage settings on the left menu. The Datastores list will come up on the right pane.
vSphere Datastores
vSphere Datastores
Right click on the datastore of the source VM and select Browse.
Datastore
Datastore
Right click on the root folder on the left tree and create a new folder. e.g Application
Copying the files
Copying the files
Select the source folder of the VM to be cloned (2008R2 Machine in this example) and select the configuration file (.vmx) and the virtual disk file (.vmdk). Right click and copy them to clipboard. Now select the destination folder and paste the two files. Finally, right click the copied .vmx file and select Add to Inventory.
Add to Inventory wizard
Enter the name of the cloned VM and finish the wizard. Now the VM has been created to the vSphere hypervisor.
In case of  using a VM as a template you should make sure that the template is unique everytime. So you must use sysprep utility to generalize the VM. In case of windows 2008R2 sysprep is included in the windows installation, under the folder c:\windows\System32\sysprep. This utility exists for other Windows versions as well.
Sysprep utility
Sysprep utility
Run sysprep and select Enter System Out-of-Box Experience, check the Generalize box and select Shutdown.
Make a generic VM template
Now everytime you power on the template VM, a mini setup will come up to configure your new VM.

Wednesday 13 January 2016

Cofigure a vSphere Replication Appliance connection

Cofigure a vSphere Replication Appliance connection  :-

GO Home vSphere Replication
Select Home Monitor
Select  vSphere Replication
Select >Action >All vSphere Replication Actions >Connect to target Site.
 Address if vCenter Server on the remote site click ok

 Verify that target sites shows one site connected .

Configure the vSphere Replication Appliance

Configure the vSphere Replication Appliance  :-

Go home and Select vSphere Replication

 Select Replication Server
 Configure the select vsphere replication server
 Configure the select vsphere replication server
 Configure the select vsphere replication server select Configure
 Proceed Anyway
 Root and Standard password
 VR tab click Configuration
 Generate and Install  OK .